웹 사이트 바로가기
바로가기 기능 개발
웹 사이트 바로가기 생성
바탕화면에 웹 바로가기 생성하는 기능에 대해 설명해보겠습니다.
북마크를 사용하면 되는 거 아닌가요? 저도 그렇게 생각했지만 생각보다 브라우저에 능숙하지 않은 분들의 cs가 꽤 들어오더군요. 그래서 사용자의 편의성을 위해 바로가기 기능을 적용했습니다. 여러가지 방법이 있겠지만 여기서 설명할 방법은 2가지입니다. 첫 번째 크롬의 앱 설치 기능, 두 번째 자바를 이용한 바로가기 생성이 되겠습니다. 그럼 시작!
1. 매니패스트를 사용한 바로가기 생성
사이트 바로가기 생성이지만 정확히 설명하면 사이트를 앱 화 시켜서 앱을 설치하는 기능입니다. 크롬 기반이지만 엣지에서도 사용 가능하고 무엇보다 코드가 간단하다는 장점이 있습니다.
url: chrome://apps
데스크탑, 작업표시줄 바로가기 생성 기능
1.1. 필수 소스
- manifest.json
- sw.js
- .js
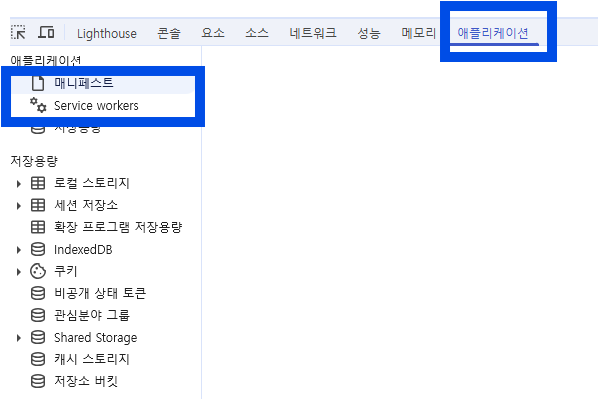
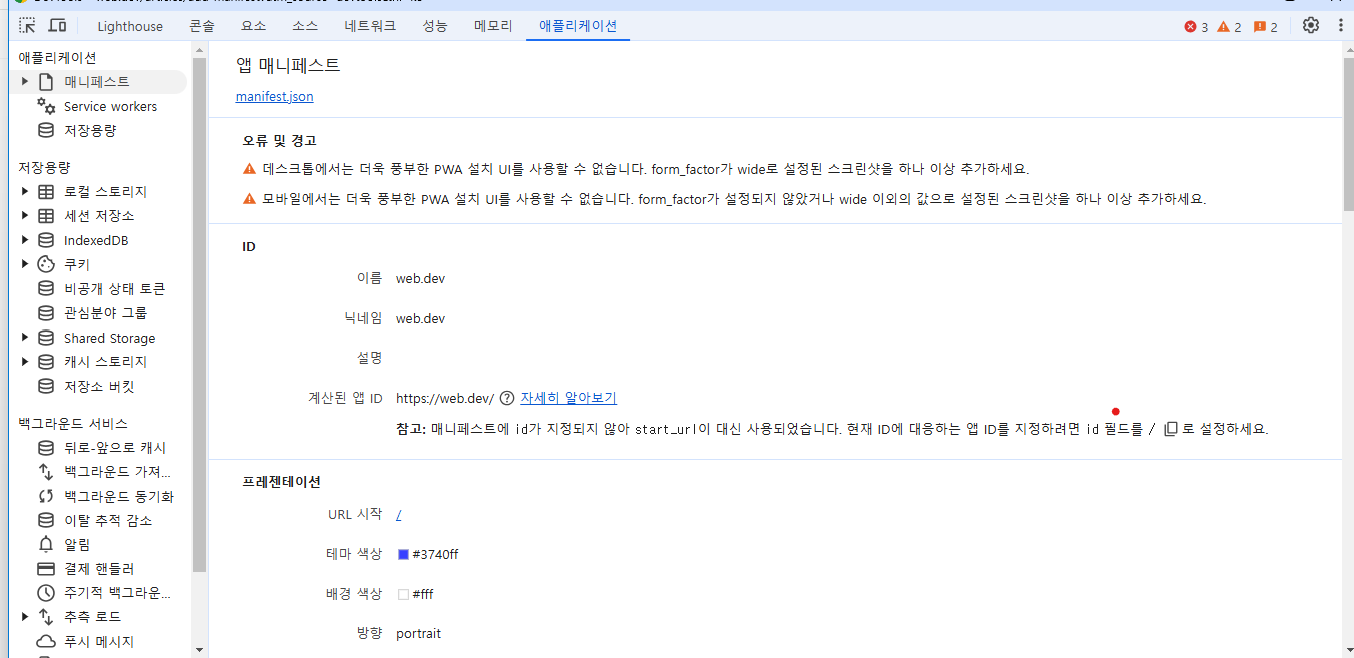
개발할 때 확인해야 하는 목록은 매니페스트와 Service workers 입니다.
매니페스트.json은 설정 값이 제대로 되어 있는 지 확인할 수 있고, Service workers는 sw.js가 동작하는지 확인할 수 있습니다.
확인 방법: 사이트 F12(개발자도구) → 애플리케이션 → 매니페스트 , Service workers
참고 사이트 (크롬에서 제공하는 공식 문서)
https://web.dev/articles/add-manifest?utm_source=devtools&hl=ko
1) manifest.json
웹 앱 매니페스트는 브라우저에 프로그레시브 웹 앱(PWA)이 사용자의 데스크톱 또는 휴대기기에 설치될 때 어떻게 동작해야 하는지 알려주는 JSON 파일입니다. 확장자는 .webmanifest 또는 JSON으로 하면 더 명확히 읽을 수 있습니다.
필수 파라미터 형식 (최소 형식)
최소한의 기능을 담은 JSON입니다. 기본 설정에는 shortcuts, screenshots 등 여러 파라미터값이 많지만 여기서는 최소화 시킨 코드로 설명을 진행하겠습니다. 만약 기본 코드로 사용하고 싶다면 주의해야 할 점은 기본 파라미터들 중에 배열인 파라미터가 있다는 것 입니다.
- 배열:
icons,shortcuts,screenshots
최소화 시킨 manifest.json
- name: 앱이 설치될 때 사용될 이름
- short_name: 사용자의 홈 화면, 런처 이름
- name과 short_name 둘 중 하나만 적어도 됨
- start_url: 사이트 다운로드 위치에 배치를 해야 함
- 설치를 진행할 해당 페이지의 api를 적어야 한다.
- ex) 기본 홈 → ‘/’ , 쇼핑 페이지 → ‘/shop’
- icons:
1
2
3
4
5
6
7
8
9
10
11
12
13
14
15
16
17
18
19
20
{
  "name": "앱이 설치될 때 사용될 이름",
  "short_name": "사용자의 홈 화면, 런처 이름",
  "start_url": "/",
  "display": "standalone",
  "background_color": "#ffffff",
  "theme_color": "#000000",
  "icons": [
    {
      "src": "/resources/js/main/manifest/파일명.png",
      "type": "image/png",
      "sizes": "192x192"
    },
    {
      "src": "/resources/js/main/manifest/파일명.png",
      "type": "image/png",
      "sizes": "192x192"  // 기본사이즈 (192 or 512)
    }
  ]
}
공식에서 제공하는 기본 manifest.json
1
2
3
4
5
6
7
8
9
10
11
12
13
14
15
16
17
18
19
20
21
22
23
24
25
26
27
28
29
30
31
32
33
34
35
36
37
38
39
40
41
42
43
44
45
46
47
48
49
50
51
52
53
54
55
56
57
58
{
  "short_name": "Weather",
  "name": "Weather: Do I need an umbrella?",
  "icons": [
    {
      "src": "/images/icons-vector.svg",
      "type": "image/svg+xml",
      "sizes": "512x512"
    },
    {
      "src": "/images/icons-192.png",
      "type": "image/png",
      "sizes": "192x192"
    },
    {
      "src": "/images/icons-512.png",
      "type": "image/png",
      "sizes": "512x512"
    }
  ],
  "id": "/?source=pwa",
  "start_url": "/?source=pwa",
  "background_color": "#3367D6",
  "display": "standalone",
  "scope": "/",
  "theme_color": "#3367D6",
  "shortcuts": [
    {
      "name": "How's the weather today?",
      "short_name": "Today",
      "description": "View weather information for today",
      "url": "/today?source=pwa",
      "icons": [{ "src": "/images/today.png", "sizes": "192x192" }]
    },
    {
      "name": "How's the weather tomorrow?",
      "short_name": "Tomorrow",
      "description": "View weather information for tomorrow",
      "url": "/tomorrow?source=pwa",
      "icons": [{ "src": "/images/tomorrow.png", "sizes": "192x192" }]
    }
  ],
  "description": "Weather forecast information",
  "screenshots": [
    {
      "src": "/images/screenshot1.png",
      "type": "image/png",
      "sizes": "540x720",
      "form_factor": "narrow"
    },
    {
      "src": "/images/screenshot2.jpg",
      "type": "image/jpg",
      "sizes": "720x540",
      "form_factor": "wide"
    }
  ]
}
2) js
1
2
3
4
5
6
7
8
9
10
11
12
13
14
15
16
17
18
19
20
21
22
23
24
25
26
27
28
29
30
31
32
(function () {
		if ("serviceWorker" in navigator) {
			navigator.serviceWorker.register('/js/sw.js').then(function (registration) {
				console.log(registration);
			}, function (err) {
				console.log(err)
			});
		}
	})();

	let deferredPrompt;
	document.getElementById('shortcut_btn').addEventListener('click', () => {
		console.log(deferredPrompt);
		if (deferredPrompt) {
			deferredPrompt.prompt();

			deferredPrompt.userChoice.then((choiceResult) => {
				if (choiceResult.outcome === 'accepted') {
					console.log('Accept');
				} else {
					console.log('Dismiss');
				}
				deferredPrompt = null;
			});
		}
	});

	window.addEventListener('beforeinstallprompt', (event) => {
		event.preventDefault();
		deferredPrompt = event;
		console.log("beforeinstallprompt");
	});
3) sw.js
- 혼자서 계속 작동
- chrome에서 지원하는 애플리케이션 기술
- 개발자 도구 → 애플리케이션 → 매니페스트, service workers 에서 확인 가능
- 매니페스트가 없으면 감지된 매니페스트가 없다고 뜸.
1
2
3
4
5
6
7
8
9
10
11
1. 기본 코드
self.addEventListener("fetch", e => {});

2. 디버깅 추가한 코드
self.addEventListener('install', (event) => {
    console.log('Service Worker: Installed');
});

self.addEventListener('fetch', (event) => {
    console.log('Service Worker: Fetching');
});
- deferredPrompt undefined로 인식되는 경우
- json에 있는 객체 형식이 맞지 않을 경우
- 이미 chrome://apps에 바로가기가 설치되어 있는 경우
주의할 점
- 매니페스트가 동작하려면 manifest.json을 생성하여 기본 정보를 입력해야 한다. (필수)
- 기본적으로 바로가기는 현재 도메인을 기준으로 생성하기 때문에 start_url에 현재 url을 입력해야 한다. (절대적임)
- webapp → static에 있는 코드를 읽어오기 때문에 icons의 파일 경로는 resources 아래에 두어야 하고, 절대 경로로 작성해야 한다. (상대 경로 인식 못함)
- 사이트에 들어가자 마자 static에 있는 코드를 읽어서 실행하기 때문에 JSON 정보를 임의로 변경하여 바로가기 생성을 하지 못함.
- 이미지는 최소 사이즈가 144px 이상이어야 함.
- 참고
1
2
3
4
5
6
7
8
9
10
11
12
13
14
15
16
17
18
19
20
21
22
23
24
25
26
27
28
29
30
31
// manifest.json 정보 셋팅
function setManifest(result) {
    try {
        // 기존 manifest 제거
        const existingLink = document.querySelector('link[rel="manifest"]');
        if (existingLink) {
            existingLink.parentNode.removeChild(existingLink);
        }

        // 새로운 manifest 추가
        const manifestLink = document.createElement('link');
        manifestLink.rel = 'manifest';

        // JSON 객체를 Blob으로 변환
        const jsonObject = JSON.stringify(result);
        const manifestBlob = new Blob([jsonObject], { type: 'application/json' });
        const manifestUrl = URL.createObjectURL(manifestBlob);

        // Blob URL을 href로 설정
        manifestLink.href = manifestUrl;

        // <head>에 추가
        document.head.appendChild(manifestLink);

        // console.log("생성된 Manifest URL:", manifestUrl);
        // console.log("동적 manifest 설정 완료");
    } catch (e) {
        console.error("Manifest 설정 중 오류 발생:", e);
    }
}
2. 자바 ActiveXShell을 사용한 바로가기 생성
- 이미지 경로는 사용자의 로컬이어야 한다.
- 이미지 확장자: .ico
- 백슬래시 주의
2.1 VBScript 파일 내용 설정
- Set oWs = “”;
- WScript.CreateObject(
WScript.Shell): WScript.Shell 생성 - sDestop: 바탕화면 경로
- sLinkFile: 바로가기 설치 경로
- Set oLink = oWs.CreateShortcut(sLinkFile): oLink에 바로가기 설치 경로 설정
- oLink.TargetPath: 바로가기 경로
- oLink.WorkingDirectiory: 작업 디렉토리
- oLink.WindowStyle = 1 (1: 일반창, 2: 큰 창, 3: 작은 창)
- oLink.Description: 바로가기 이름 설정
- oLink.IconLocation: 아이콘 이미지 경로 (로컬파일시스템 절대경로여야 함)
- oLink.save: 저장
- VBScript 파일 생성
new File("createShortcutWithIcon.vbs");: 바로가기 아이콘 생성BufferedWriter writer = new BufferedWriter(new FileWriter(scriptFile));: script 넣음writer.write(vbScriptContent);: 1~11번까지 스크립트 String 변수에 넣음writer.close();
- VBScript 실행
Runtime.*getRuntime*().exec("wscript createShortcutWithIcon.vbs").waitFor();
- VBScript 파일 삭제
scriptFile.delete();
1
2
3
4
5
6
7
8
9
10
11
12
13
14
15
16
17
18
19
20
21
22
23
24
25
26
27
28
29
30
31
32
33
34
35
36
37
38
39
40
41
42
43
44
45
46
47
48
49
50
51
52
53
54
55
56
57

 try {
      String serverIconUrl = "http://localhost:8080/common/images/icon.png";
      String localIconPath = System.getProperty("user.home") + "\\desktop\\test.ico";
      logger.info("localIconPath = " + localIconPath);
      // 아이콘 파일 다운로드
      downloadFileFromServer(serverIconUrl, localIconPath);

      // VBScript 파일 내용 설정
      logger.info("자바바로가기");
      String vbScriptContent =
              "Set oWS = WScript.CreateObject(\"WScript.Shell\")\n" +
                      "sDesktop = oWS.SpecialFolders(\"Desktop\")\n" +
                      "sLinkFile = sDesktop & \"\\테스트.lnk\"\n" +
                      "Set oLink = oWS.CreateShortcut(sLinkFile)\n" +
                      "oLink.TargetPath = \"https://www.test.co.kr\"\n" +
                      "oLink.WorkingDirectory = \"C:\\\\Program Files\\\\Example\"\n" +
                      "oLink.WindowStyle = 1\n" + // 1: 일반 창
                      "oLink.Description = \"테스트 바로가기\"\n" +
                      "oLink.IconLocation = \"" + localIconPath + "\"\n"  +
                      "oLink.Save";

      // VBScript 파일 생성
      File scriptFile = new File("createShortcutWithIcon.vbs");
      BufferedWriter writer = new BufferedWriter(new FileWriter(scriptFile));
      writer.write(vbScriptContent);
      writer.close();

      // VBScript 실행
      Runtime.getRuntime().exec("wscript createShortcutWithIcon.vbs").waitFor();

      // VBScript 파일 삭제
      scriptFile.delete();
      logger.info("아이콘이 포함된 바로가기가 성공적으로 생성되었습니다!");
      return new ResponseEntity<>(HttpStatus.OK);

  } catch (IOException | InterruptedException e) {
      e.printStackTrace();
  }


// 서버에서 파일 다운로드 메서드
private static void downloadFileFromServer(String fileURL, String savePath) throws IOException {
    URL url = new URL(fileURL);
    HttpURLConnection connection = (HttpURLConnection) url.openConnection();

    try (InputStream inputStream = connection.getInputStream();
         FileOutputStream outputStream = new FileOutputStream(savePath)) {
        byte[] buffer = new byte[4096];
        int bytesRead;
        while ((bytesRead = inputStream.read(buffer)) != -1) {
            outputStream.write(buffer, 0, bytesRead);
        }
    }
    System.out.println("아이콘 다운로드 완료: " + savePath);
}
3. 결론
1. 매니페스트
장점
- 간단한 코드로 바로가기 생성 가능
- 바로가기 세분화 설정 가능 (이미지, 내용, 제목 … )
- app으로 저장되기 때문에 바로가기, 작업표시줄 저장 같은 다양한 설정이 가능함.
단점
한번 설정한 json 설정은 임의로 변경 불가능
예) 도메인에 따라 바로가기 설정을 다르게 하고 싶다 → 불가능함
로컬 앱(태블릿, 핸드폰)에서 테스트 진행을 하기 위해서는 승인된 SSL이 필요함
→ 앱에서 작동이 안되더라도 사이트에서 작동 되면 앱에서도 작동됨 90% 확률
2. ActiveXShell
장점
- 브라우저 제약 없이 사용 가능
- 파일로 생성되기 때문에 매니페스트 같이 app화 되지 않음
특정 변경 값에 따른 바로가기 설정도 변경이 가능함
예) 파라미터에 따라 다른 값 설정 가능
단점
- 이미지를 설정하기 위해서는 해당 이미지를 유저의 컴퓨터에 설치해야 함